Recording Rides
Start and stop a ride, keep recording reliable in the background, and edit your rides afterwards.
Before you ride
You can only record rides in the mobile app. The app needs to read your location while the screen is off, so the first time you record it asks for location access.
- iPhone: allow location access, then choose Always when asked, so recording carries on in your pocket.
- Android: allow location all the time and keep precise location turned on.
If something is missing, the app shows a message with a Settings button that opens your phone's settings for Ride Hermes.
Starting, pausing and stopping
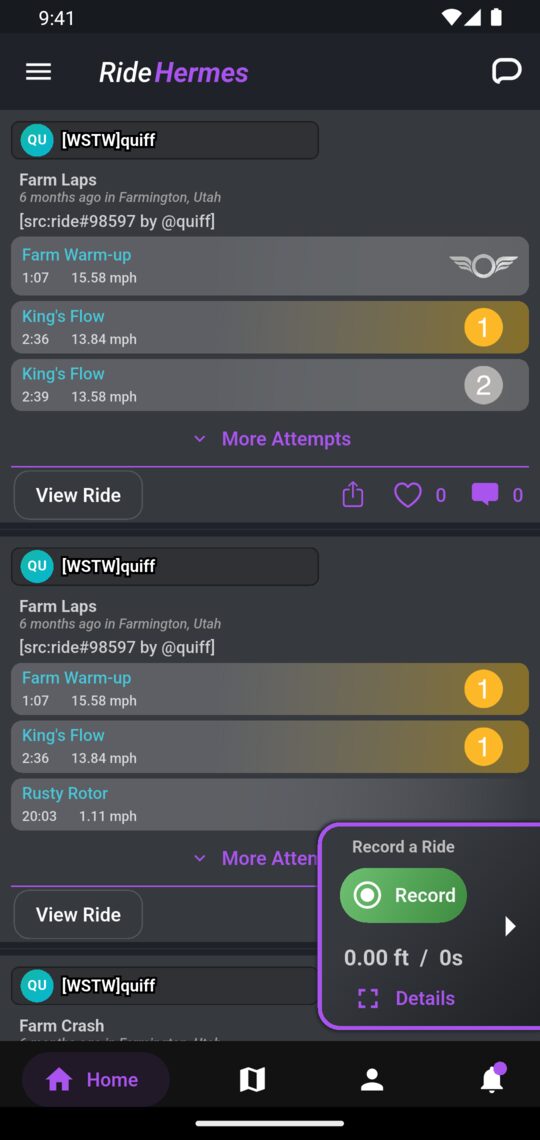
The record button is the small purple tab on the right-hand edge of the screen. Tap it to open the quick recording menu.
- Tap the green Record button.
- Wait for GPS. While the app finds your position you'll see Preparing your GPS to ride... Moving a short distance helps. When you see Ready to ride! you're good to go.
- Ride. The menu shows your time and distance as you go. Tap the arrow to tuck the menu away. The ride keeps recording.
- To take a break, tap Pause. Tap Resume to carry on with the same ride.
- When you're done, tap Pause and then Stop. This opens the ride details so you can save the ride.
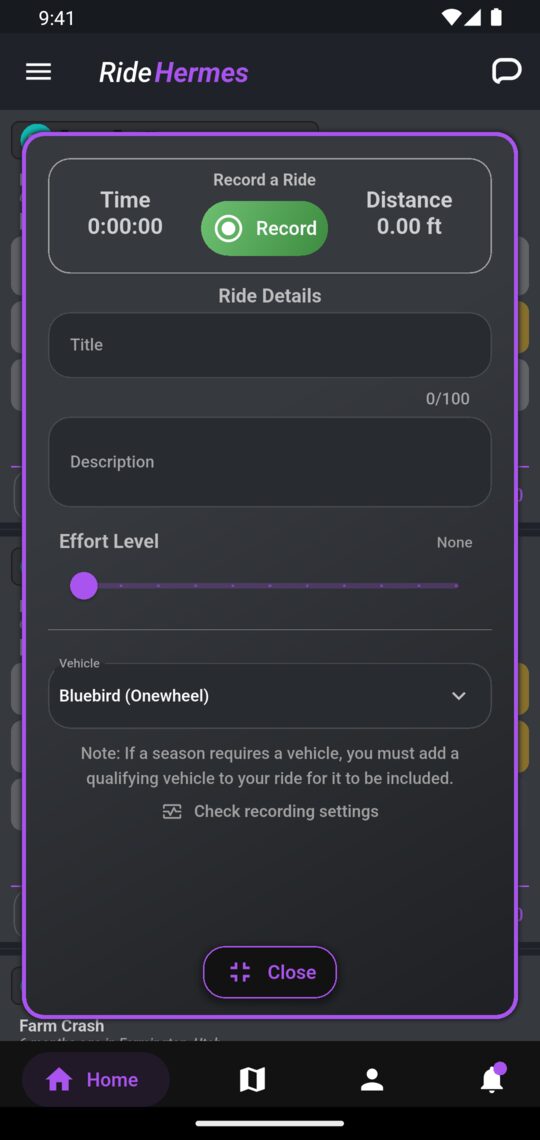
Tap Details at any time to expand the menu to full size, and Close to shrink it again.
Saving your ride
The expanded menu shows a Ride Details form. Everything on it is optional:
| Field | What it's for |
|---|---|
| Title | A name for the ride, up to 100 characters. |
| Description | A few words about the ride. |
| Effort Level | A slider from 1 to 10 for how hard you pushed. Leave it at None to skip it. |
| Vehicle | The vehicle you rode. Your favorite vehicle is picked for you. Choose None if it wasn't one of yours. |
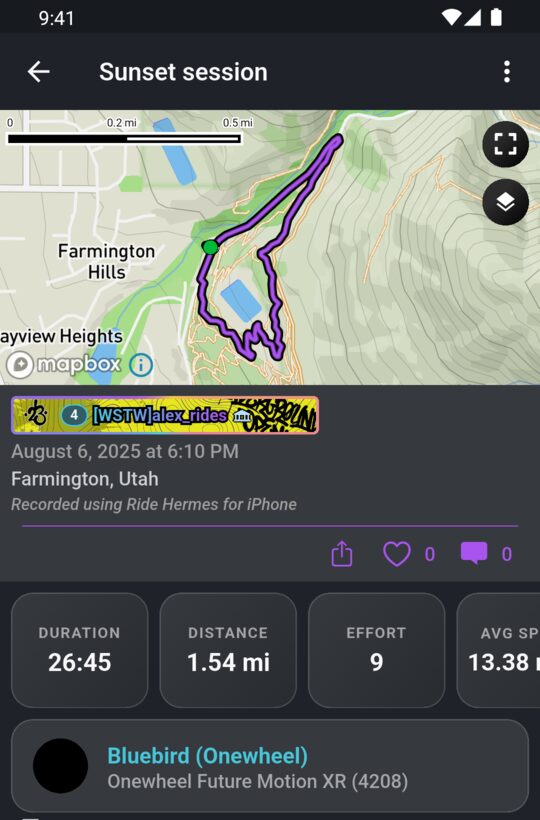
When you're ready, tap Upload Ride. The app opens your ride page with the duration, distance, effort and speeds, plus any trails you rode. To throw the recording away instead, tap Delete Ride and confirm. That can't be undone.
How trail times are recorded
You don't have to start anything special to race a trail. Record a normal ride, and after you upload it, Ride Hermes checks your route against the trails nearby. Every trail you rode properly becomes a trail attempt, with a time on that trail's leaderboard.
What counts
- You pass through the trail's start and later through its finish, in the direction the trail was made.
- In between, you follow the trail's line. A few small gaps are fine, but cutting a corner or skipping part of the trail doesn't count.
- Your time runs from the moment you cross the start to the moment you reach the finish.
If a time is missing
- Make sure the ride was uploaded. Rides waiting on your phone aren't checked until they upload.
- Check the recording settings below. If your phone paused recording in your pocket, the gap can break the match.
- When a new trail is created, or a trail's line changes, rides that were already uploaded are checked against it too. So an older ride can pick up a time later.
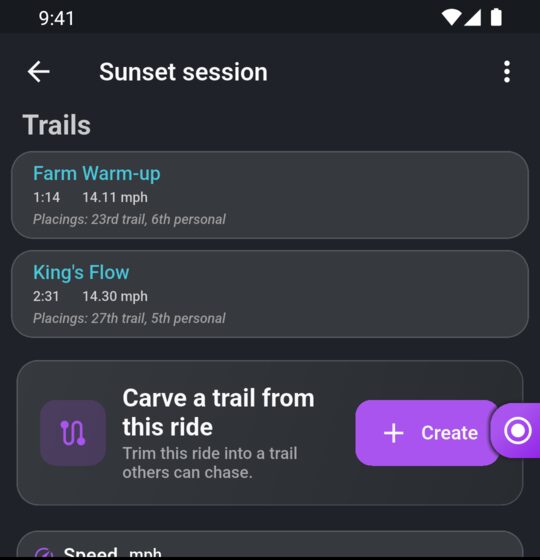
The ride page lists every trail attempt from that ride. More on leaderboards and creating trails is in Trails & Leaderboards.
Keeping recording reliable
Phones save battery by limiting apps that run in the background. That can thin out or stop your GPS track partway through a ride. Ride Hermes checks for the settings that cause this, and helps you change them.
The reminder when you start a ride
Right after you tap Record, the app checks your phone's power settings. If one could affect your ride, a message appears at the bottom of the screen, such as Battery saving is on and may throttle GPS during your ride. Your ride is already recording. The reminder never delays or blocks it. Where there's a setting to change, the message has a Fix button.
The app shows one reminder per ride, for the most important issue. The battery-saving reminder comes back on every ride while battery saving is on. The other reminders stop after a few rides, or once you've opened the setting from the reminder.
Checking your settings any time
- Open the record menu and tap Details.
- Scroll to the bottom of the form and tap Check recording settings.
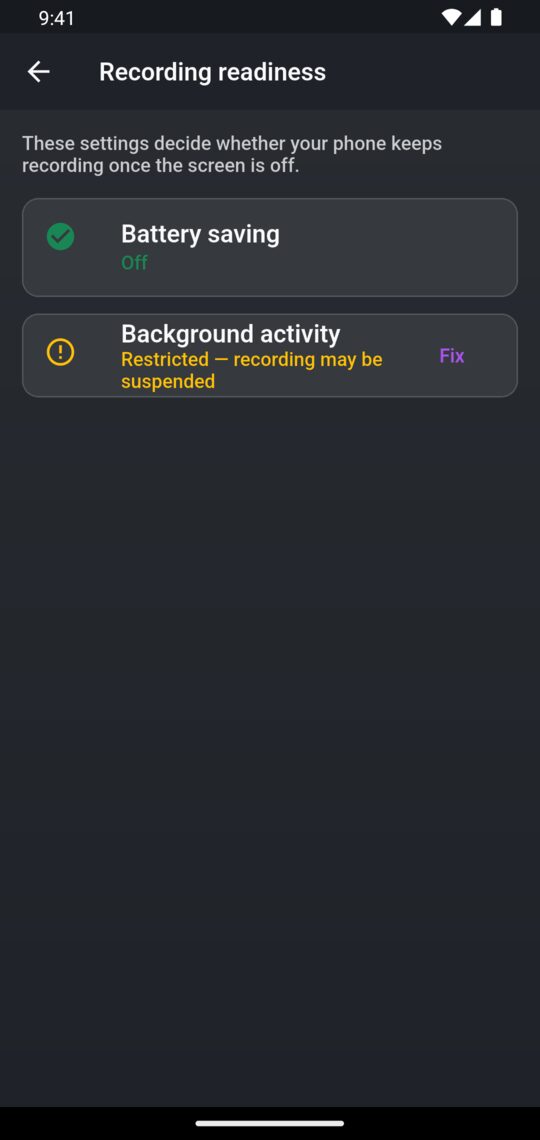
The Recording readiness screen lists each setting with a green tick when it's fine, or a warning when it may stop recording. It updates when you come back from your phone's settings.
iPhone
| Setting | What to do |
|---|---|
| Battery saving | This is Low Power Mode. Turn it off in Control Center or in Settings > Battery before you ride. There's no Fix button because iPhone doesn't let apps open that screen. |
Android
| Setting | What to do |
|---|---|
| Battery saving | Battery Saver. Turn it off from Quick Settings (swipe down from the top of the screen) before you ride. |
| Background activity | Android's battery optimization can suspend recording. Tap Fix, then Open settings. You'll see a list of every app on your phone. Find Hermes and choose Don't optimise or Unrestricted. |
| Vendor power manager | Some phones (Samsung, Xiaomi, Huawei, OnePlus, Oppo and others) have their own power manager on top of Android's. The app can't read this setting, so it shows Can't be checked automatically. Tap Fix for steps for your phone. On Samsung, for example, add Hermes to Never sleeping apps. On Xiaomi, turn on Autostart for Hermes. |
You only see the rows that apply to your phone. A Pixel, for example, has no vendor power manager, so that row doesn't appear.
Rides that didn't upload
If your ride can't upload, for example because you have no signal at the trailhead, the app keeps it saved on your phone so nothing is lost.
- Open the side menu. A Pending Rides card shows how many rides are waiting.
- Tap it to open Local Rides.
- Tap Upload on a ride to send it again, or Delete to remove it from your phone.
If an upload fails again, the ride stays on your phone. Try again when you have a better connection.
Editing a ride
In the app
- Open the ride from your profile or your feed.
- Tap the menu at the top right and choose Edit.
- Change the Title, Description or Vehicle, tick Hide to keep the ride to yourself, or drag the Trim ride slider to cut off the start or end.
- Tap Save.
On the website
- Open the ride and select Edit Ride.
- Change the title, description or vehicle, or tick Hide.
- Use the Start Point and End Point buttons to crop the ride on the map.
- Save your changes.
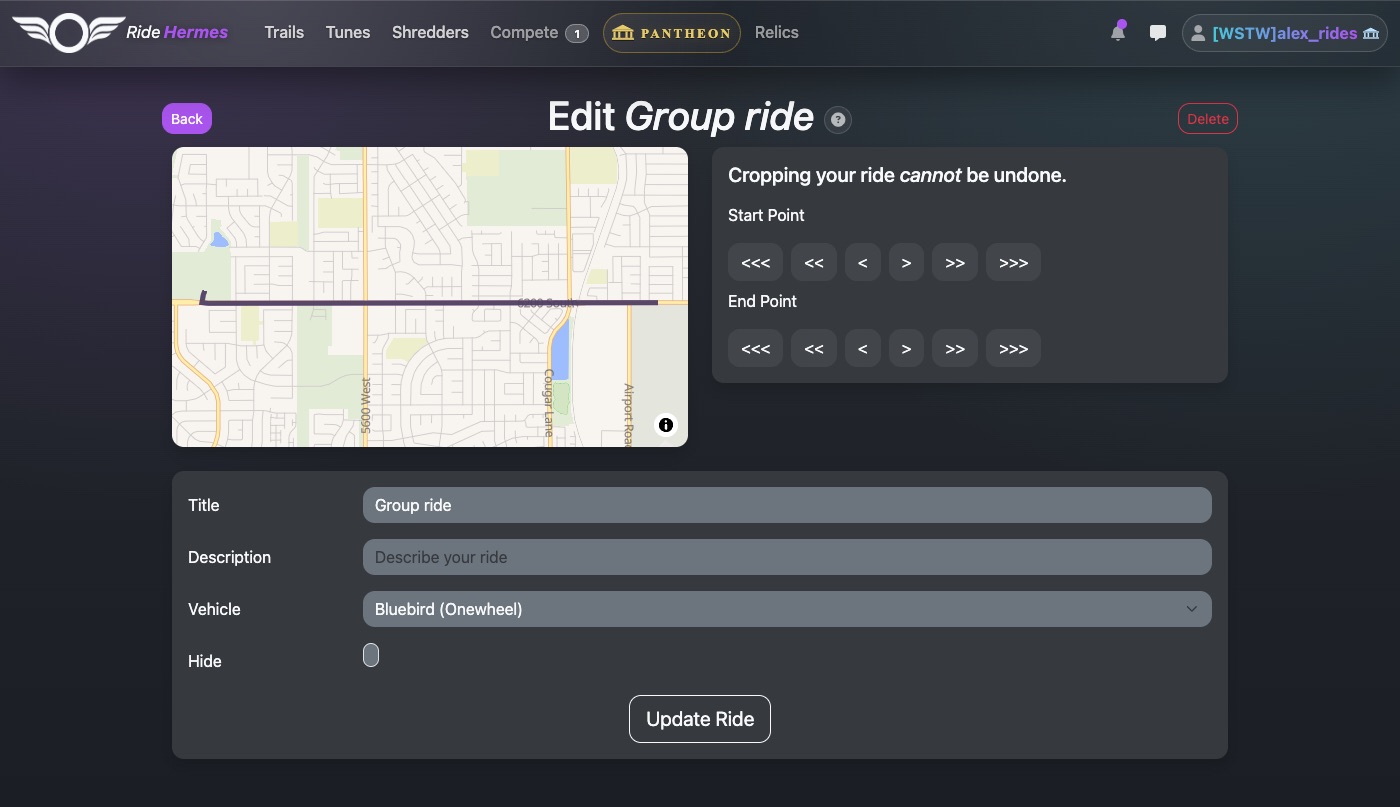
On the website's ride page you can also edit a single trail attempt to hide or delete it, using the Edit button next to it.
Hiding a ride
A hidden ride, and its trail attempts, stay off leaderboards, out of the social feed and out of sight of other riders. You can still open it yourself, and its ride page shows a Hidden label. Untick Hide to bring it back.
Deleting a ride
You can delete an uploaded ride on the website. You can't do it in the app.
- Log in on the website and open the ride.
- Select Edit Ride, then Delete.
- Confirm. The ride and its trail times are removed for good.
If you just want the ride off leaderboards, hide it instead. You can always undo that.
Your ride page
Every uploaded ride has its own page in the app and on the website. It shows the map of your route, duration, distance, the vehicle you rode, and every trail attempt with its time and rank. Other riders can like and comment on it. On the website you'll also find speed and elevation charts. Hover over a chart to see where you were on the map.
Rode somewhere new? From your own ride page you can turn part of the ride into a trail for others to race. In the app, use Carve a trail from this ride. On the website, select Create a Trail. See Trails & Leaderboards.